 |
| The end result of my ugly duck nightstand refurbishing & mod podge project from last post. |
Oh, how thrilled I am of my DRAB to FAB stand night stand & just elated to share the 'fabness' with y'all!
 |
| The DRAB night stand BEFORE (Keep in mind that I edited this pic so it looked MUCH worse, lol) |
 |
| The FAB night stand AFTER Awesome, Right? Can you believe that this is the same piece of furniture from 1982 that has sat by my husband's head since he was a little boy? It's amazing what a little motivation, passion & elbow grease can CREATE! |
So, I ended my last post giving you the first steps in my tutorial for this drab to fab project & will finish them for you below so that you can re-create a new look for your own furniture!
Painting-
After the 2 coats of primer dried ever so fast- I was ready to paint! I went to our nearest home goods shop & picked out different color palettes and put each one on top of the night stand in order to decide the perfect shade that I had in my head. The shade that best fit our room decor was called 'barely beige'. With that, I bought a gallon of that one shade of paint so that I could later refurbish the chest of drawers to match. (A quart of paint would be just enough to paint this night stand alone with 2 coats.) I chose to buy the brand 'Valspar-paint+primer' because this paint has always been a favorite of mine because of it's very high quality.
I used my new larger 'Purdy' paint brush to PATIENTLY & NEATLY paint the top & sides. I used a smaller brush to paint the front & drawers because it is easier and will detail much better. With every brush stroke you paint you must be consistent- meaning putting only a small amount of paint on your brush & simply go up and down covering your surface area. You don't want to goop the paint on, having it drip or be sloppy or you will not get a smooth surface! =( (This happens when you don't take your time-)
Making the Design For the Surface-
You can create just about any kind if design you would like out of fabric, paper, ect. Just as long as you can apply mod modge to adhere your design & seal it on your surface- the ideas are limitless!
For my design I chose to use scrapbook paper-about 15 different pages..which leads us to my next step:
How to Make my 'Quilted Scrapbook Diamond' design:
 |
| Add caption |
Here in my small town we don't have a "Craft" Store (We have an awesome local fabric shop that I'm hoping to feature in an upcoming blog, but we have no Micheals, Hobby Lobby, ect.) So I headed to our Super Wal-Mart to find a pack of scrapbook paper that I could use for my idea that would tie into my bedroom's color scheme! My bedspread is a shade of turquoise so within the 100 sheets of paper - lucky for me a few sheets had just the perfect amount of turquoise! YAY! To top it off I found it for $5.00 and it was perfect-
 |
| As you can see I picked my favorite sheets out of the pack and I cut them into 4" x 4" squares. I then took one whole piece of paper to use as the foundation to place my squares on. |
Ready for the Miraculous, Multi-Tasking MOD PODGE...
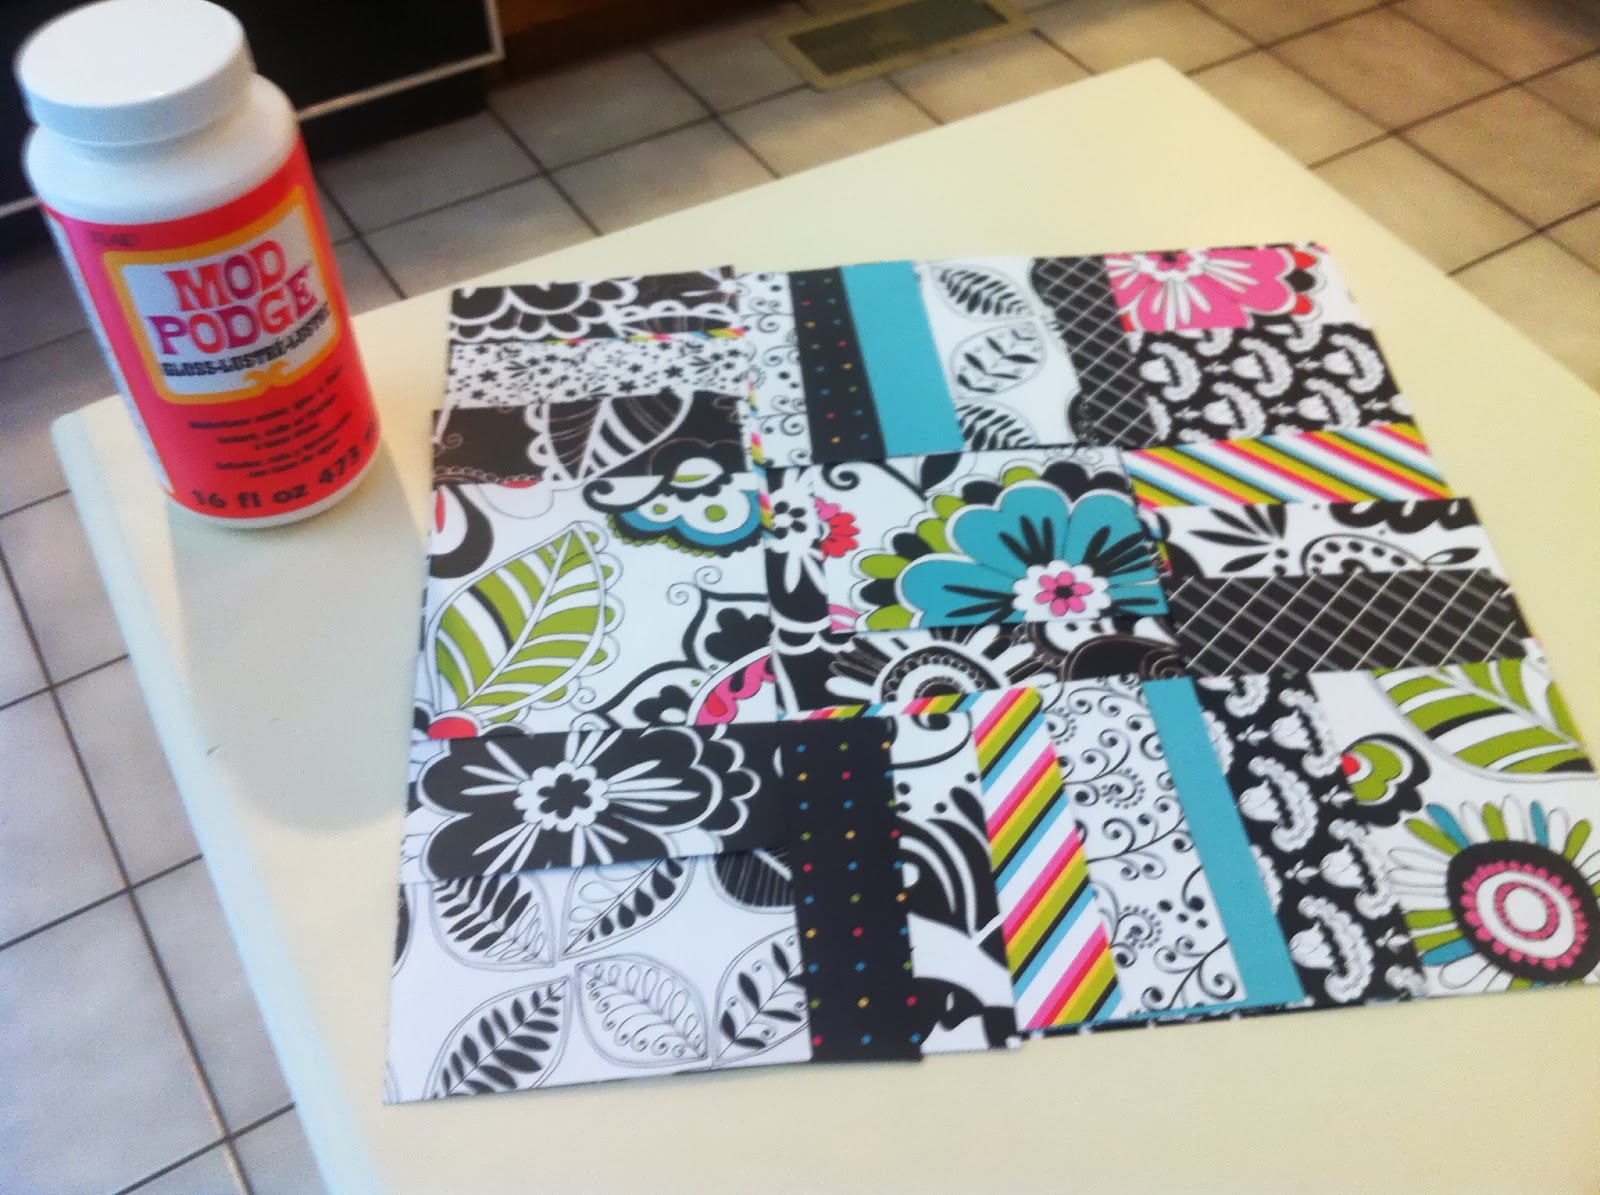
I chose to make a 'quilted' look by simply placing my squares on top of the whole piece of scrapbook paper by overlapping them all around the edges. I overlapped them allowing a peek of each pattern to show. The peek varied in size. (meaning I chose to show more of some patterns than others)
I poured my mod podge out in a bowl and took my sponge paint 'brush' and covered the bottom of each square and quickly laid them on the paper. Then I took 2" wallpaper plastic wall paper roller to roll any bubbles- keeping it nice & smooth! I did this to each and every square I layered onto one another.
Next I was ready to make this square 'quilted' design a permanent one onto the top of the very well prepared night stand! (LOL- it should be after all that!)
This step is an important one because it definitely matters how u apply your mod podge to adhere your design. (This was a learning process for me too!)
You have to make sure that you EVENLY apply your MPodge and to be sure that you apply enough. I applied mine to the back of my design not exactly evenly nor enough and pressed it firmly in the center of the top of the surface. I took my little roller and rolled, rolled and rolled. But, I had to take a small acrylic paint brush and apply more MPodge under and between a few places. I did end up with a few tiny flaws, but little flaws just make it more unique, right?
However, next time I will lay my design on my surface exactly where I want it & very lightly trace around it with pencil. Then I would brush the mod podge directly onto my surface within my tracing & then lay my design on it. Instead of rolling and rolling- (ESP with a 2" plastic roller because it caused creasing here and there) I would take the heaviest book I had and place it on top of my design. I do believe that would do a beautiful job of evenly adhering your design- bubble & crease free!
Again, either way- take your time! =)
Now you will want to seal your design by brushing mod podge over your entire design & the entire top of the (in this case) night stand. Very Neatly! :@
Patience is key for the best turn out!
Final step to finishing with Polyurethane Perfection
Your thinking... "Another painting step, Seriously?"
Absolutely! Honestly, I thought the same, but after all of your hard work & looking at your work of ART you simply must apply a sealant to protect all of this awesomeness in its entirety for as long as possible! You will have to use a water based (clear) polyurethane. There definitely wasn't a huge selection to choose from and it's a bit costly- but it's a must! I bought 1 quart and will be able to use it on a quite few future restoring projects as well.
Apply at least 3 coats for optimum protection- I applied 4- couldn't hurt! LOL
Also, before I put this new FAB night stand by our bed- I will be having glass cut to place on top to ensure that all stays as it is! Considering this is a practical piece to be used, but last- I'm all about top glass! :)
But, don't forget to put FAB drawer KNOBS too!

These drawers if you noticed before had 'old school HANDLES' so I looked for handles that would fit- no luck there because they don't make that size of handles anymore! LOL
So I was left with no choice but to replace the handles with 2 knobs on each drawer since there were 2 holes in each drawer where the old handles use to live.
I couldn't imagine 2 knobs working, but I found 2 square, sleek, black & super cool knobs. They were PERFECT- I simply turned them around to look like diamonds to match my diamond design on top! How fitting is that? =)
That's it, my friends! I hope you enjoyed the detailed tutorial of my drab 2 FAB night stand project! I enjoyed this so much & sharing it with you even more so! I really hope this inspires you to either do this project. a similar project,
Or just get your creative juices flowing!
Here is one last look of this project to get you inspired:
 |
| BEFORE: What a DRAB! |
 |
| Sanded, Primed & Painted |
 |
| Created Design, Mod Podge, knobbed drawers, & sealed w/ poly |
 |
| AFTER: Super FAB! |
Check back soon for my next creative endeavor or something neat! Please comment, share, and please, oh, please share your before and after pics of your own beautiful creations!
Email them to:
kreativekatiekonnect@gmail.com
Click below to Like & Post on my facebook page:
It looks amazing and I love the quilt diamond design on the top. That was a nice touch! Keep up the great work.
ReplyDelete